
I have used to handsoff function since my iMac 2011 Mid and also my Macbook Pro 2012 Mid. It is such a useful feature for me especially using it with my other i-devices (iPhone and iPads). I’m also a big fan of using Magic Mouse (Don’t judge me, I still use razer mouse for gaming). Unfortunately the default bluetooth 2.1 + EDR module aren’t up the the standard for lag free magic mouse glory.
Today my post is about on how to fix that.

It’s too damn expensive after conversion. As of today it’s cost us RM 683.15. That’s nearly half of the cost of my Mac Pro 4,1 (Single CPU).
Thank god I have some connections in GuangZhou China in HuaQiangBei. That’s where we can find some brilliant chinese makers who can make some awesome upgrade kit for us. Made a few calls by Wechat, I’ve found a nice chap willing to put together a similar upgrade kit for me.
It took the package about 10 days to arrive to my home. Before the item arrived, a few members (Mac Enthusiast) that I met over the course of the last whole month has been anticipating for this upgrade. It seems like a significant upgrade to our system especially for those who depends on the hands-off function.
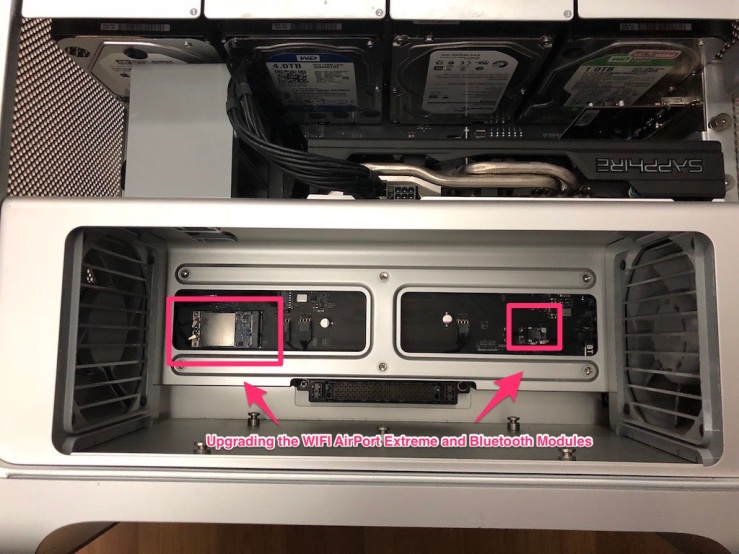
The upgrade has to be made by removing my Airport Extreme Card and also the Bluetooth Modules.
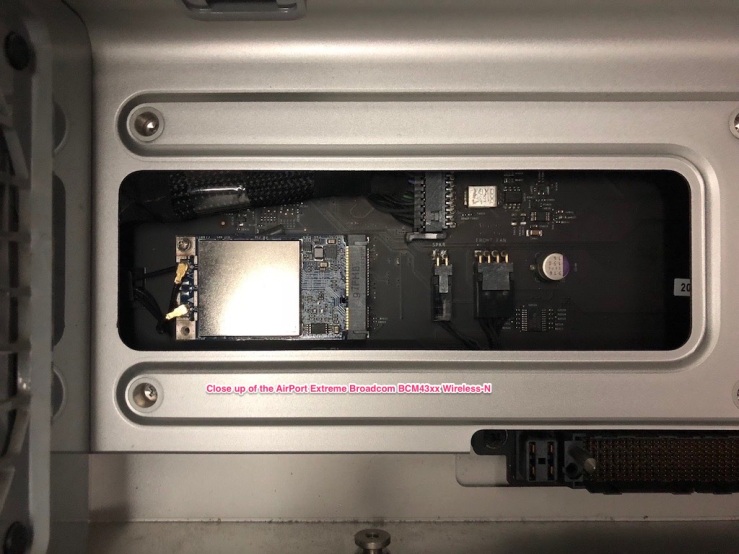
Here’s a close up of how it looks like in my Mac Pro. It was installed in my previous upgrade.

This is the original Bluetooth Module with BT 2.1 and EDR (whatever it means).
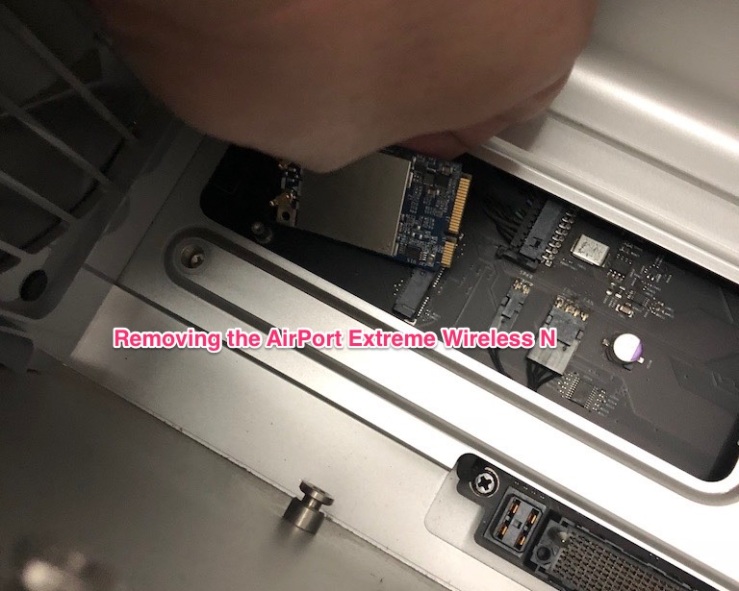
Removing the Airport Extreme is easy. Just uncrew and remove.
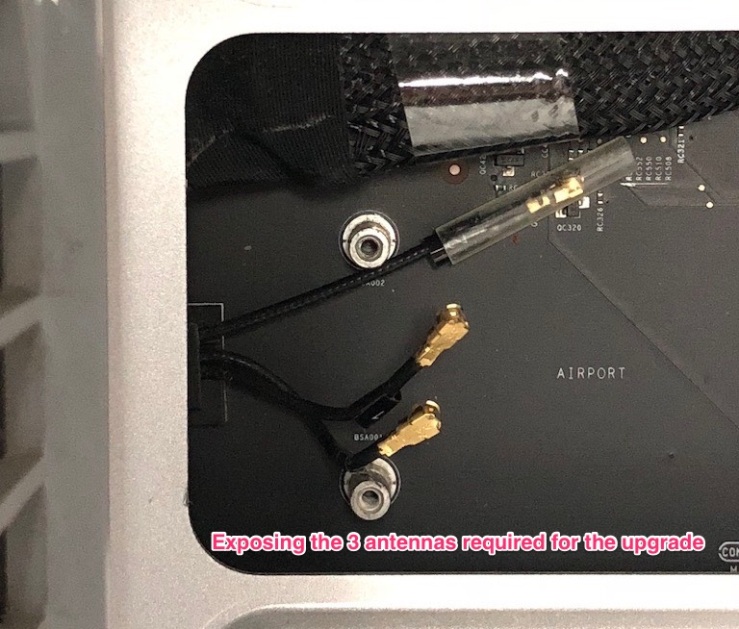
Here we can see 3 antennas which labled with 1, 2 and 3. Has to be very careful with this as we has to plug in to the new Airport PCI card in the correct order.
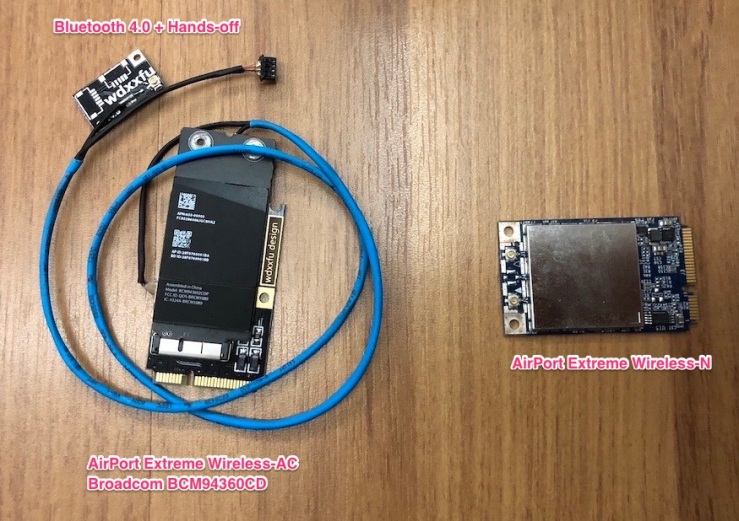
Here’s the comparison shot of the new Airport Extreme card and the old.
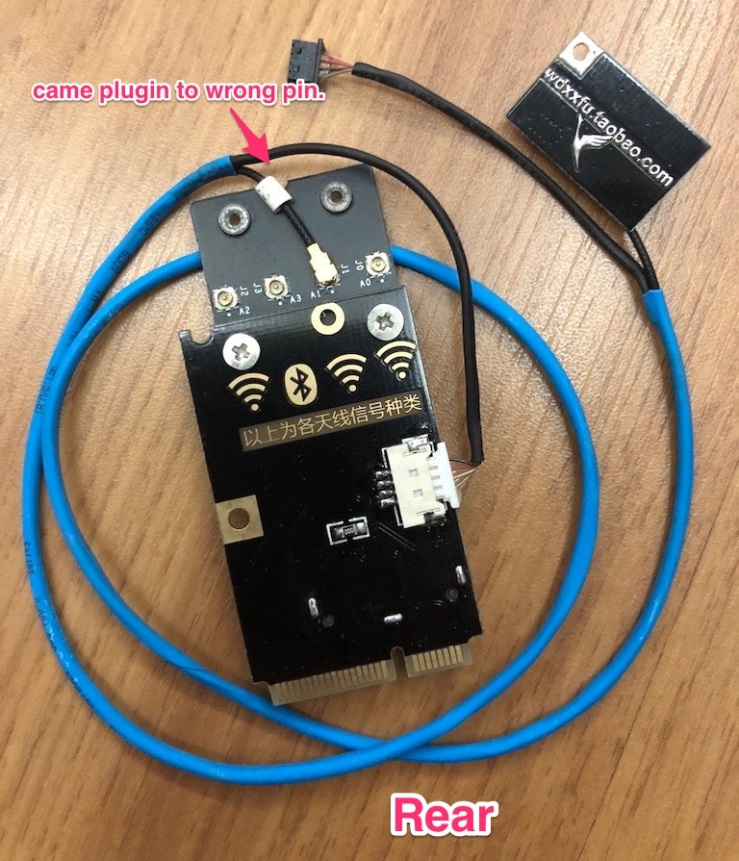
The card came with the BT antenna plugged in to the wifi port of the card. Gave me a bit of trouble to find out. In fact, the supplier in China don’t even know that the card has to be follow a certain order for antenna to work properly. In my first few tries, the signal keeps dropping and I have to keep tinkering with it to get it work properly.
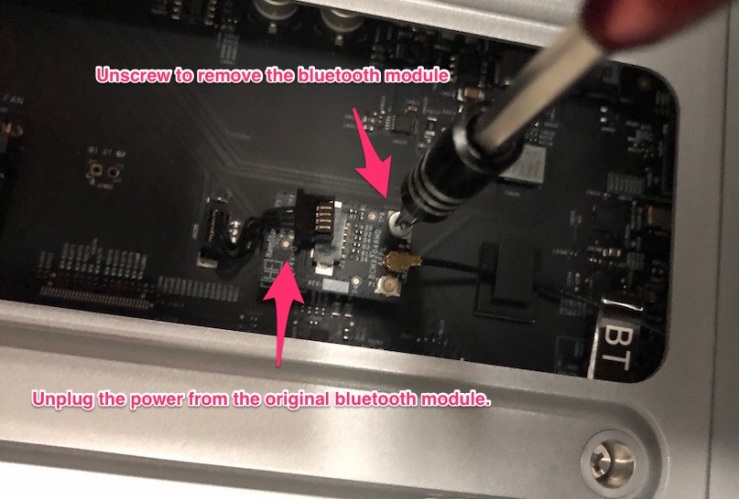
Removing the Bluetooth Module.
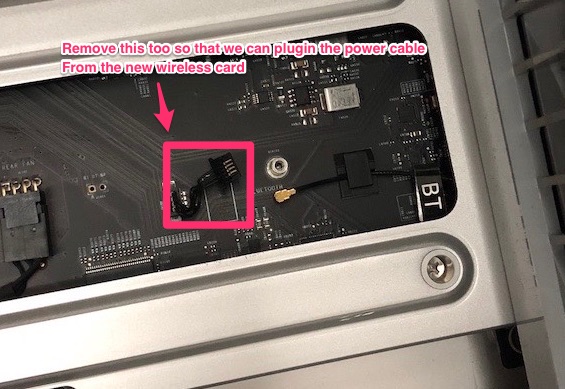
This is how it looks like without the Bluetooth Module. However, then I realised that I should have removed the power cable for the bluetooth module too so that I can fit in the new power cable for the airport extreme.
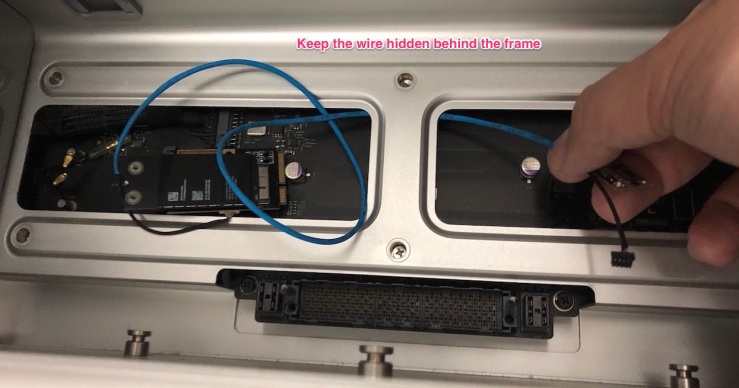
Manage the cable by hiding behind the frame. I did a lousy job of hiding it actually. Perhaps I should ask those chinese suppliers to paint their cable black next time. haha…
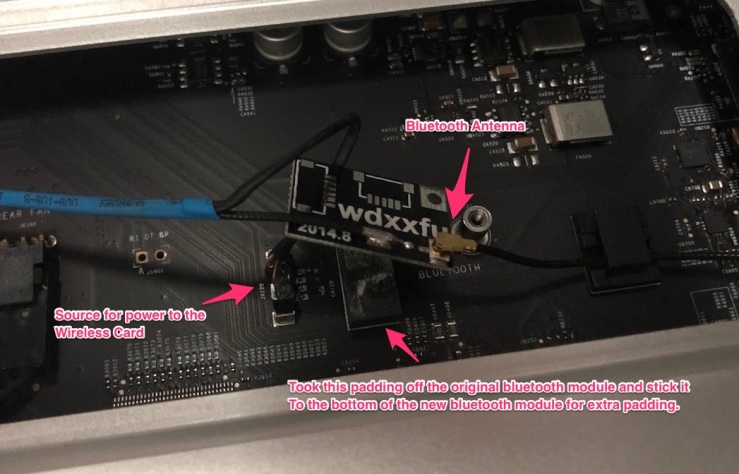
There is a piece of pad under the original bluetooth module. I’ve tried to reuse that in the installation.
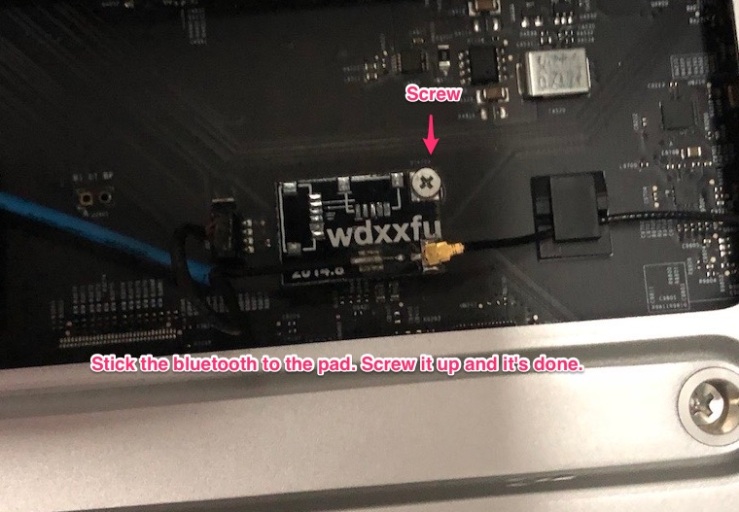
tighten the screw and I call it done for the Bluetooth Module.
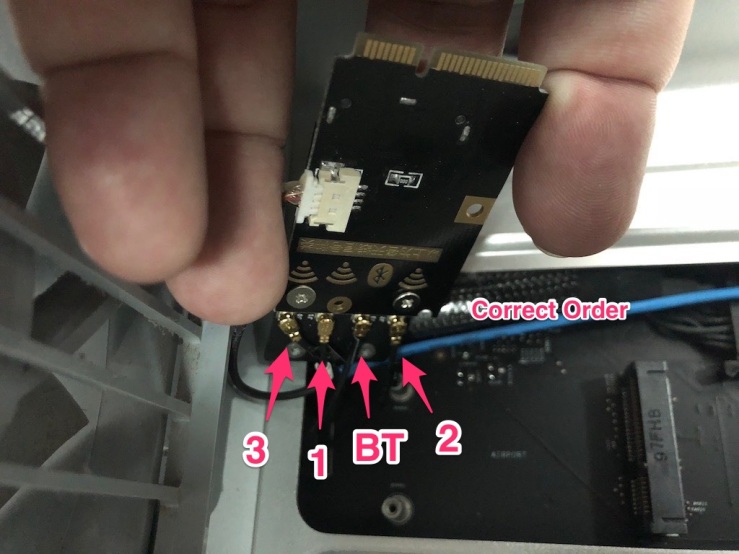
Now, here’s the installation order for all of the antennas in the airport extreme card. The antenna is actually plugged in to the PCI card that’s holding the airport extreme in it. Make sure that you follow my order or you’ll have a finicky experience with your WIFI and Bluetooth signal.
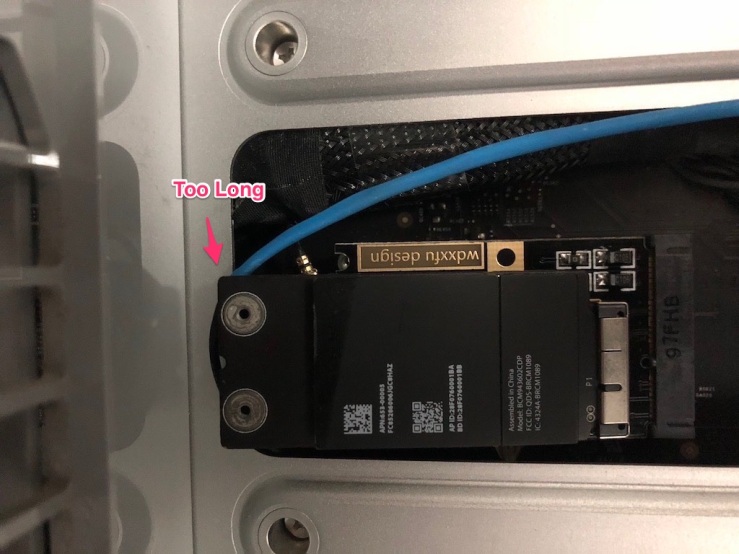
The issue with this card is also the length of the PCI card. It’s actually longer than the frame of the Mac Pro casing. To install it, first I have to let the rear portion of the card under the frame first. Make sure that none of the antenna went lose and then plug the whole PCI card in to the socket. Quite tricky, but I got it done anyway.
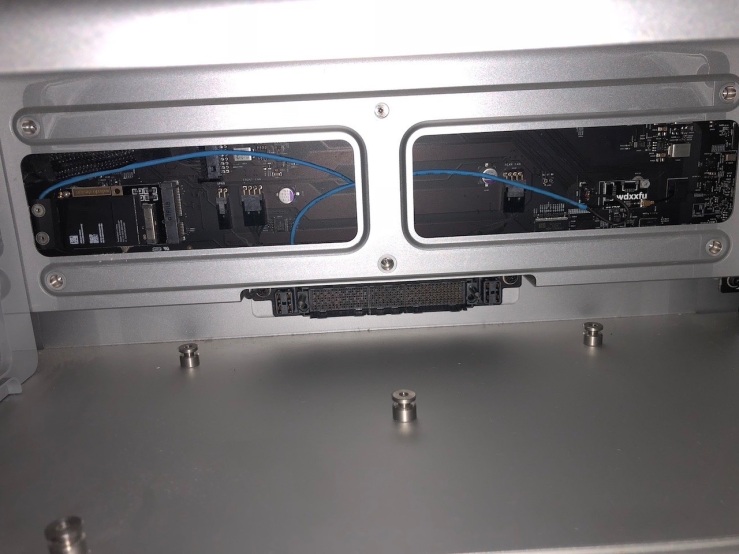
This is how it looks like when it’s done. Excuse me again for the lousy job of not hiding the extension cable properly.
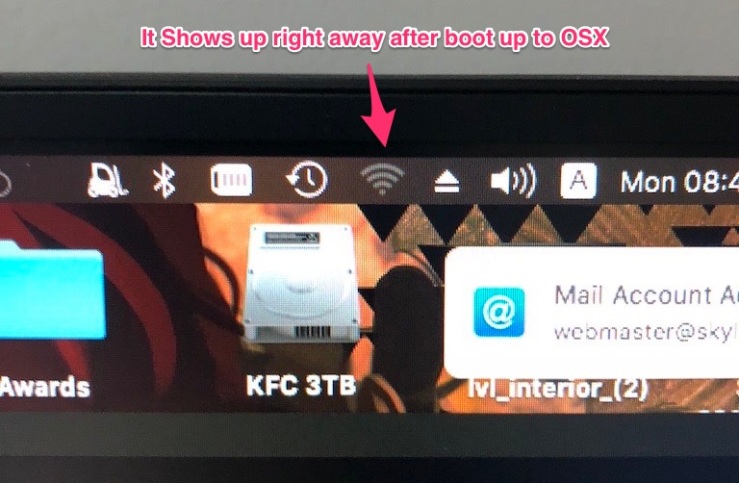
First check, Wifi shows up!
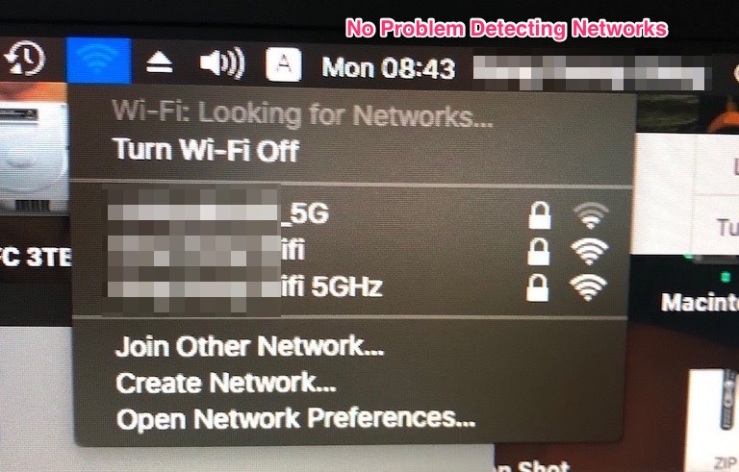
My 5GHZ networks detected. Connected fine.

Hands-off supported!

I got all of the installation done within 15 minutes. However, the fiddling to find the correct antenna order took me close to 45 minutes.
The whole upgrade kit cost me RM 350 inclusive of shipping to Malaysia. It cost only 50% of the total cost of identical kit from osxwifi.com. Eventhough it’s not the exact kit but I really have to give those HuaQiangBei Wizards in GuangZhou props for making the clone version works.
If anyone here wanted to make an order, just drop me a comment here and I can make the arrangement to courier the kit to you guys. The base cost of the item is USD 75 not inclusive of shipping cost. For those who knows me personally, just drop me a message. Cheers.
