

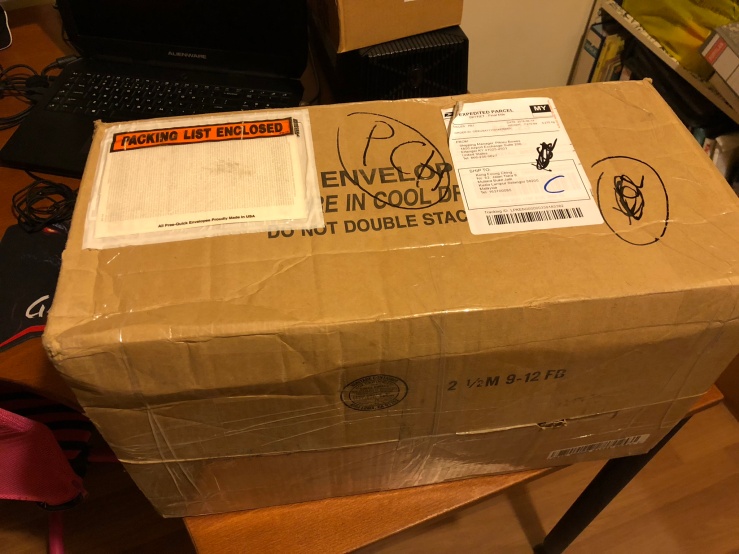
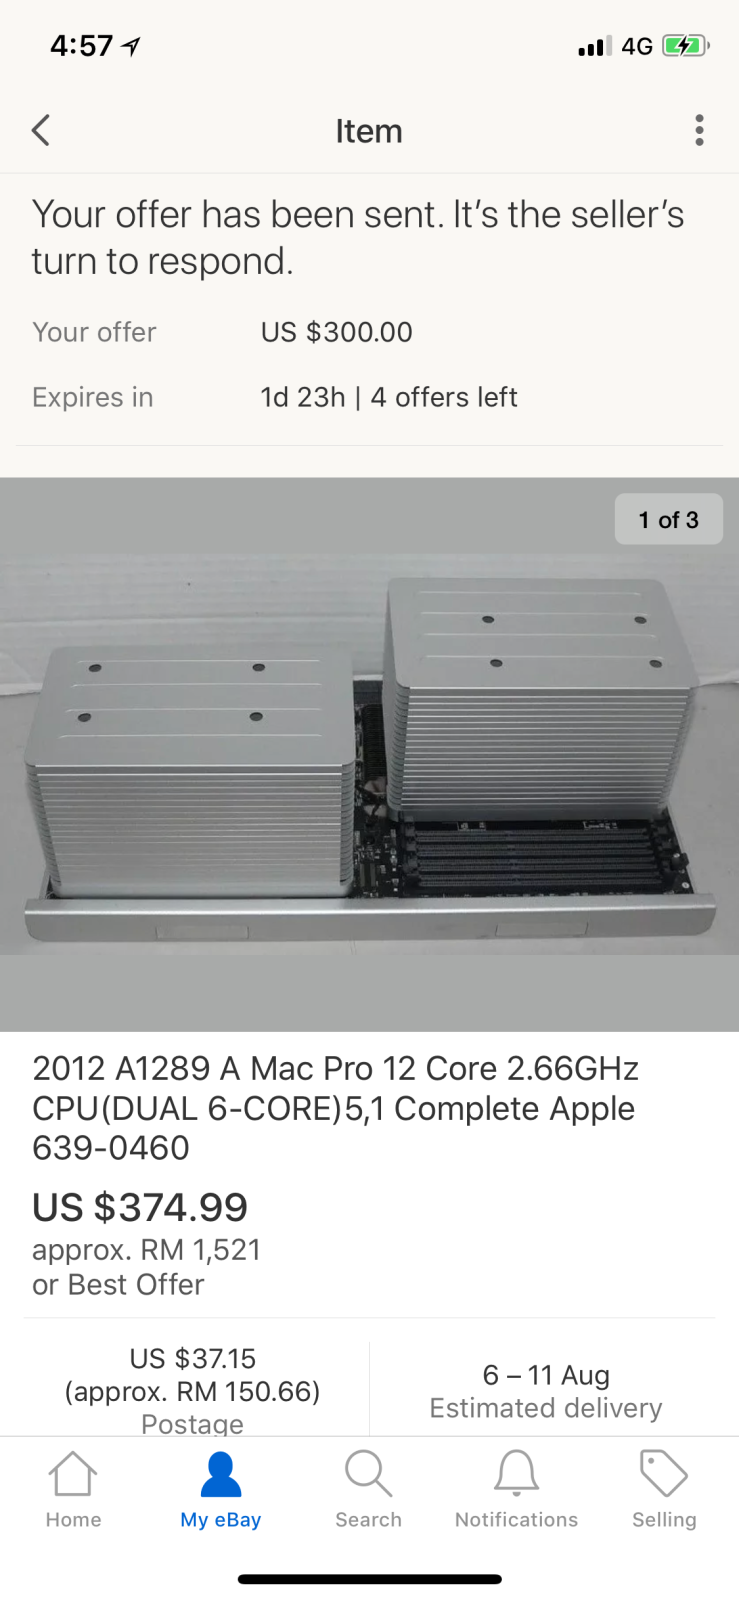
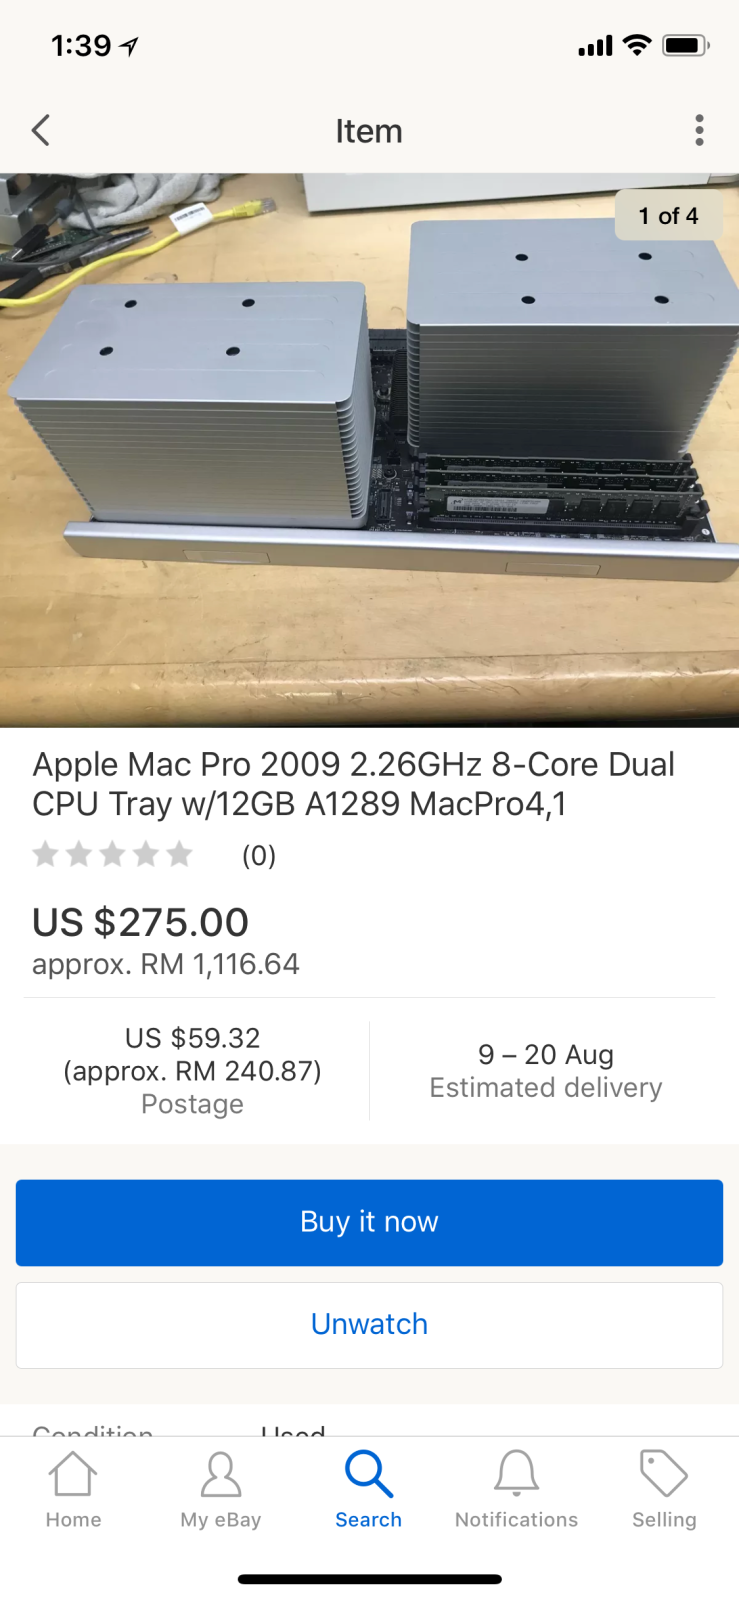
Just a while ago, I’ve snipped 3 sets of dual cpu tray for Mac pro 4,1 and 5,1 from ebay. Took them a couple to 3 weeks to arrived.
The first tray is for 4,1. I started the first upgrade project to dual cpu with this 4,1 tray. According to informations from other users in forum and reddit, this tray can’t be use in 5,1 machine and vice versa.
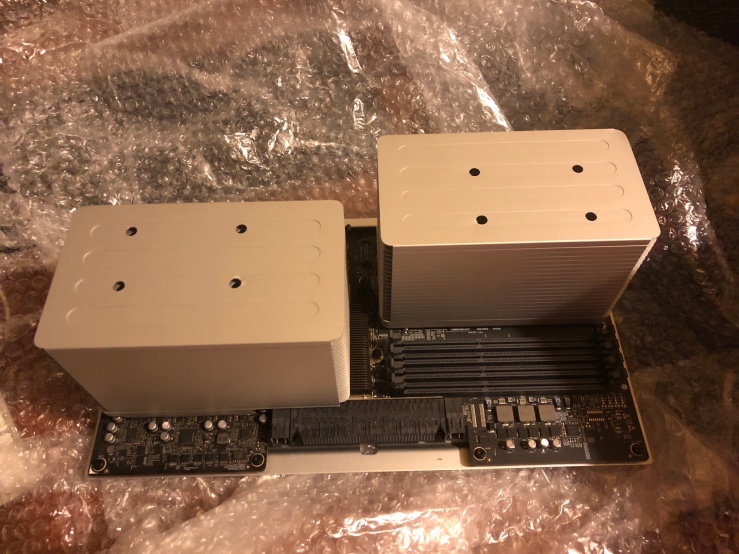
The cpu tray came without ram but it came with two installed cpu. It’s a 2.66GHz Quadcore Intel Xeon.
Thrown it to geekbench 4 64 bit and the result seems to be quite close to a 6 core X5690 Xeon for Multi-core. Single core wise the X5690 still better (close to 3,000 for single core).
I’ve removed the CPU heat sink and found out that one of the push pin of the north bridge heat sink broken. The system turns out to be very unstable with the lose heat sink. It overheats and freeze after a few minutes.
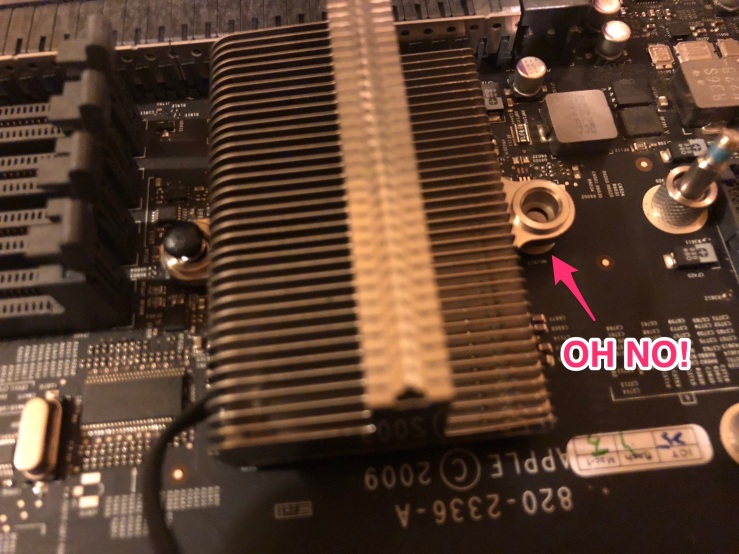
Here’s how the broken push pin looks like.
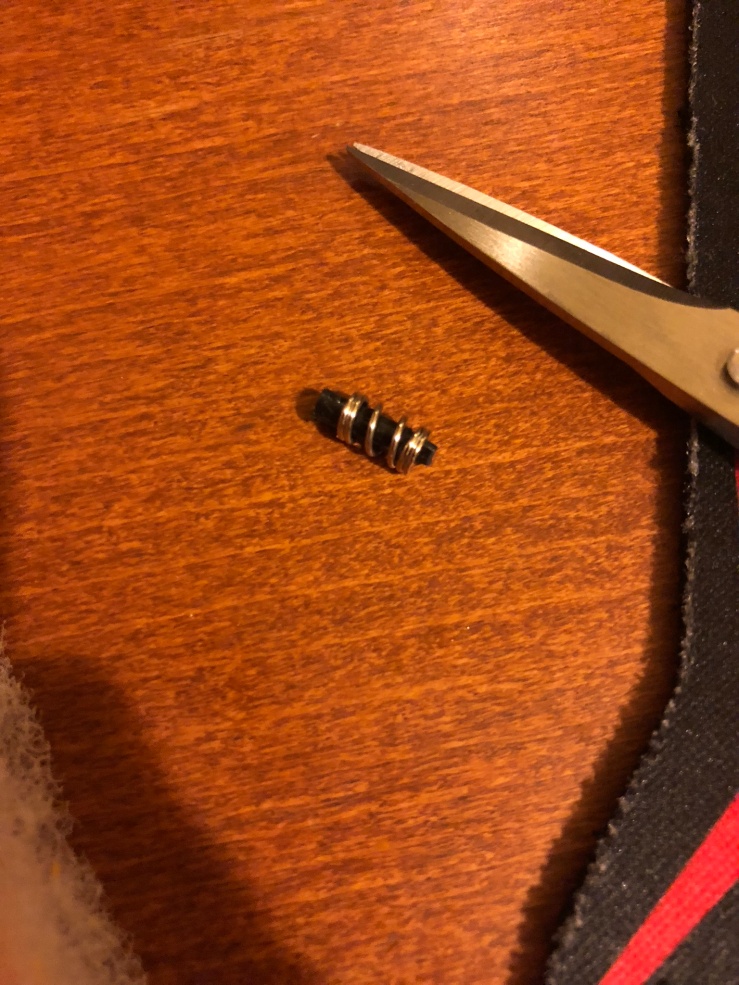
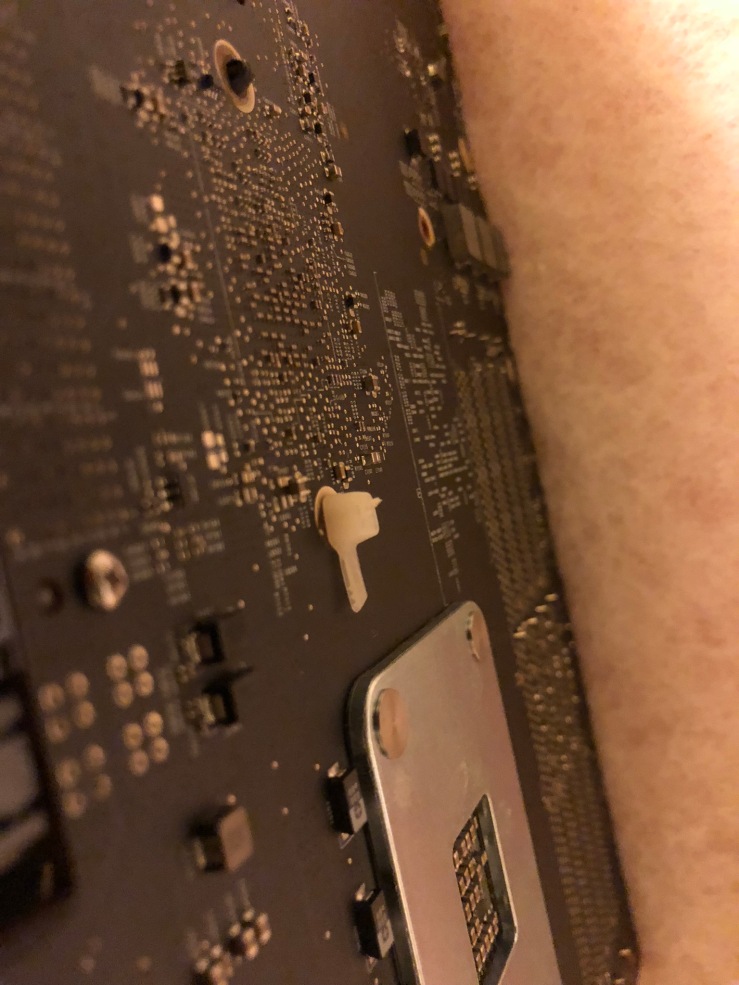
After doing a bit of research, I’ve took the whole motherboard off the tray by unscrewing all of the screw. Removed the northbridge heat sink as well and redo the thermal paste. Then I replaced the push pin with zip ties.
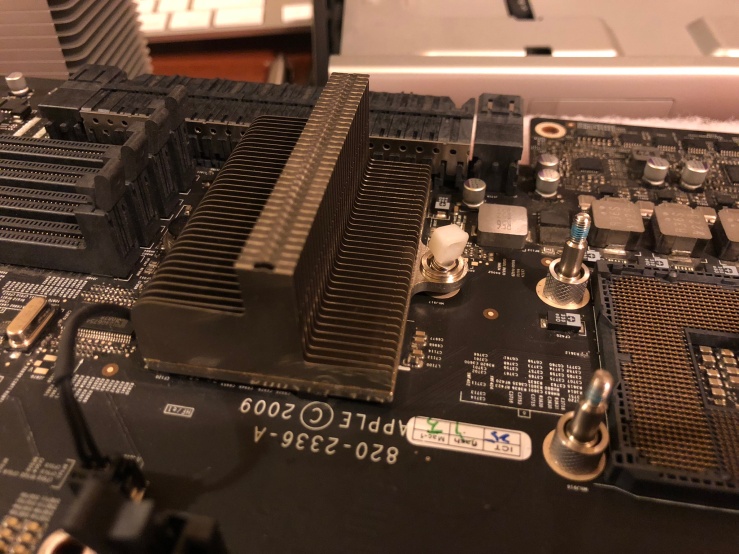
This is how it looks like under the motherboard. The fix seems to work fine.
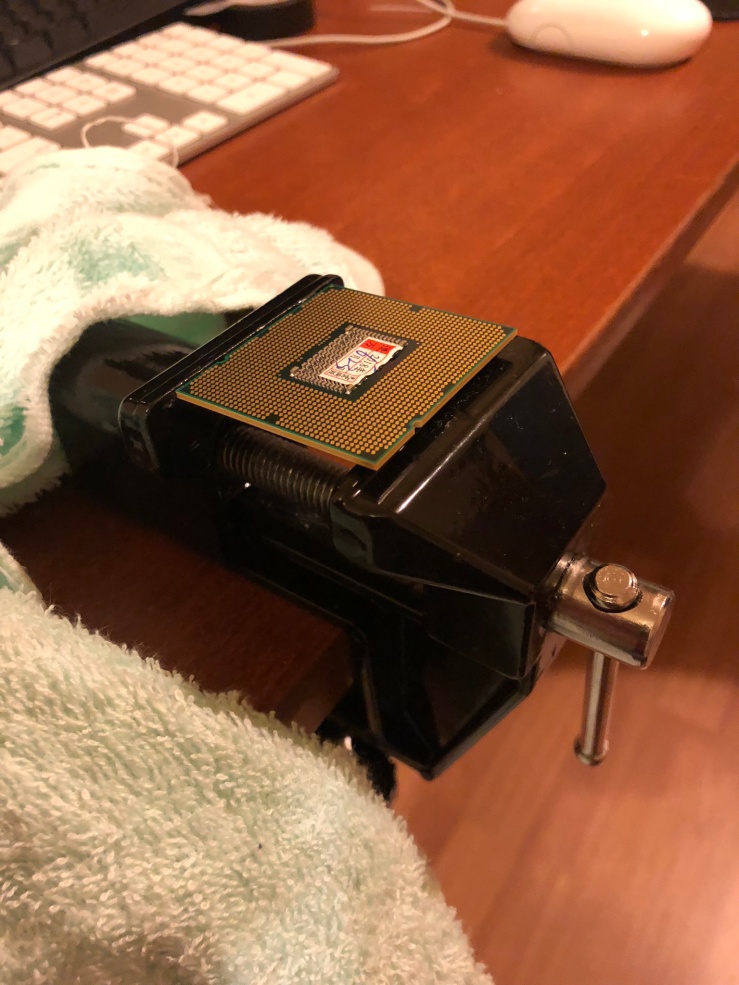
Due to the reason that 4,1 dual cpu are using delidded CPU. I have tried to find way to install the CPU the way it is. Tried using washers and etc but none of the method works. I end up following a youtube video https://www.youtube.com/watch?v=yP8FpwrGeTk
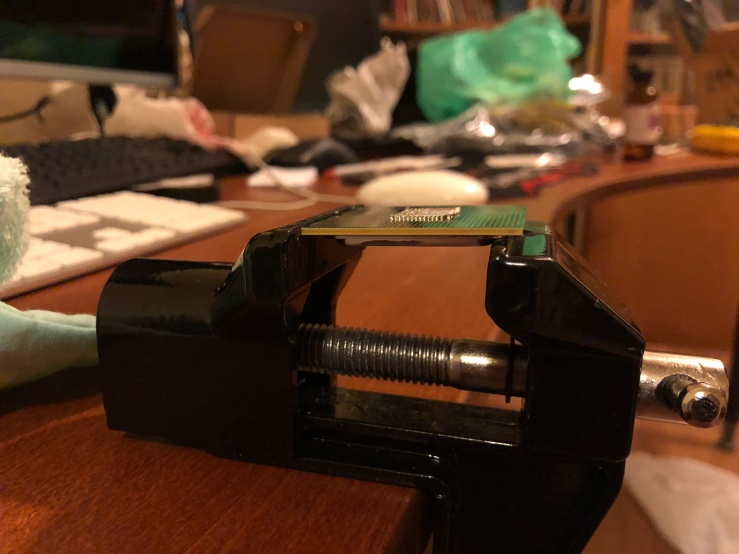
Bought a small vice and tried to remove the lid with brutal force method.
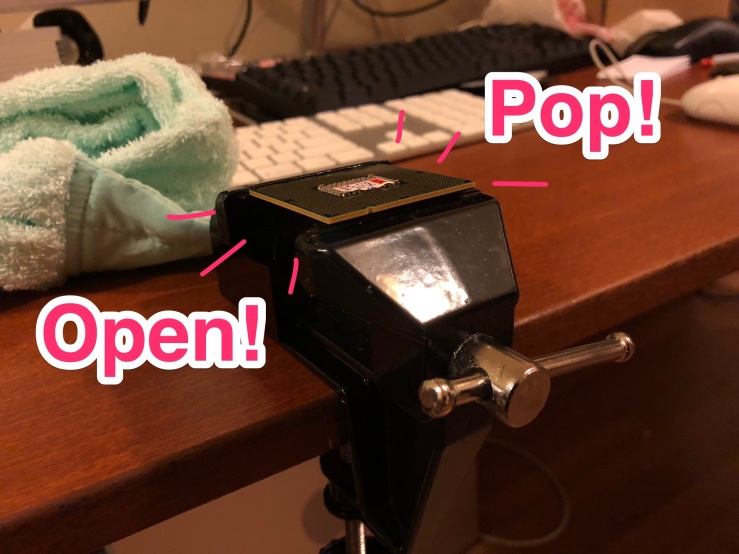
Applied quite a lot of force here. Until I thought I was almost breaking the cpu. My hands hurts like hell.
After close to 30mins of struggling, I’ve finally be able to hear the “Pop” opened sound.
On the cpu, we can still see some remaining solder.
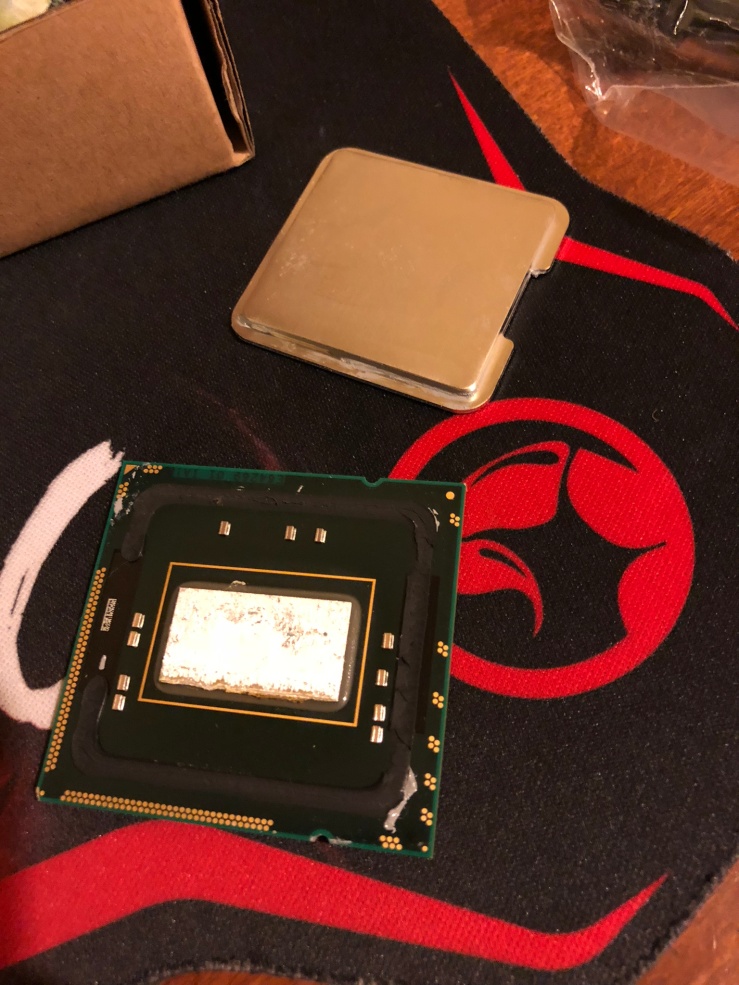
I have to use a membership card to scrub the solders off.
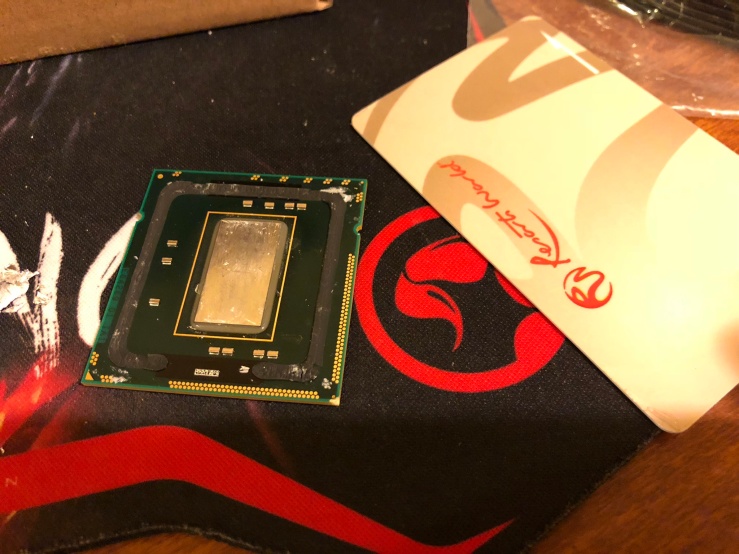
It’s going to work as long as it looks clean enough when you can see the shiny part of the cpu.
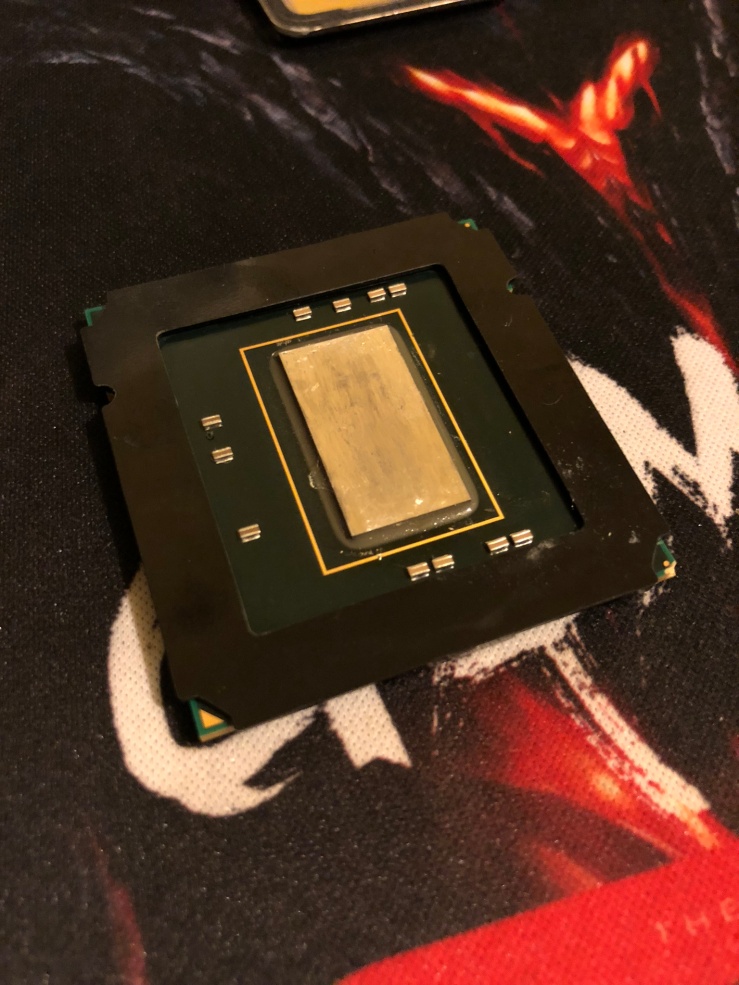
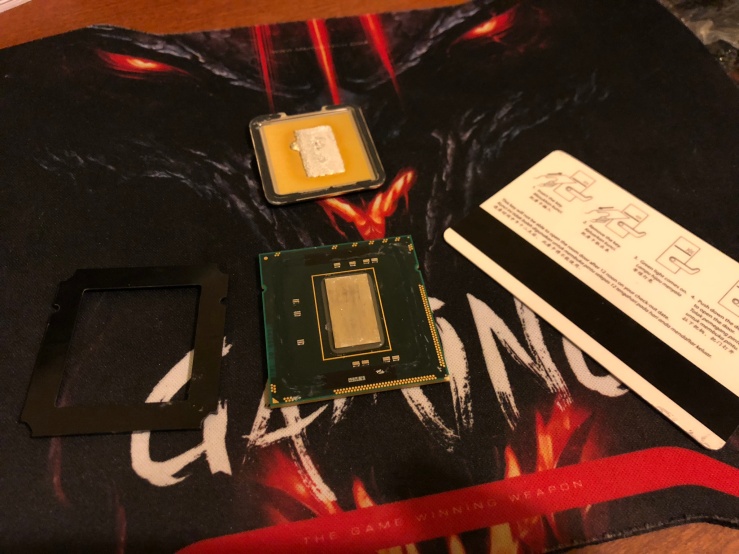
Time for thermal paste.
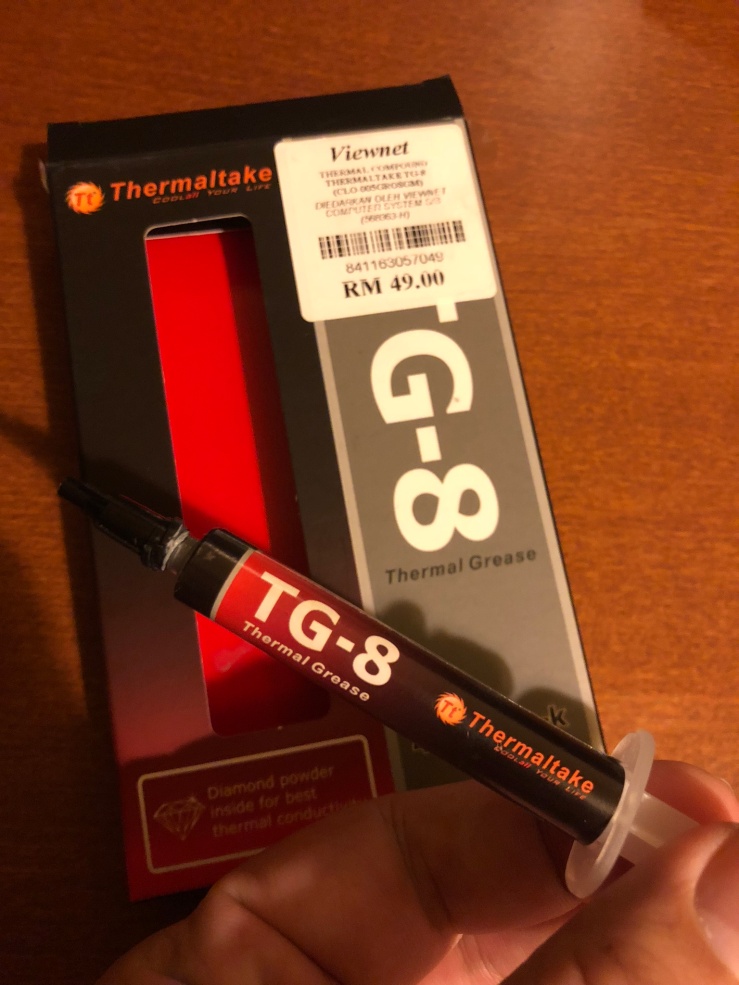
Using a spreader I’ve spread the thermal paste nicely on top of the cpu. Also I’ve put on the cpu socket bracket came with the cpu tray.
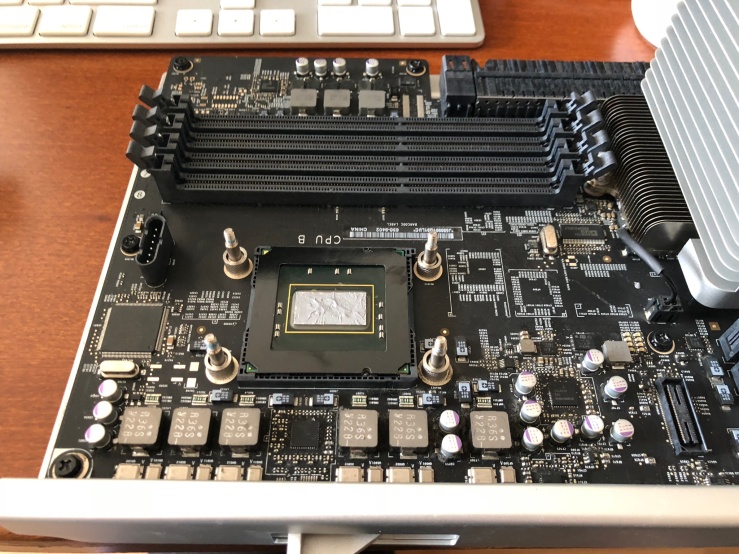
Now it’s time to try to boot it up.
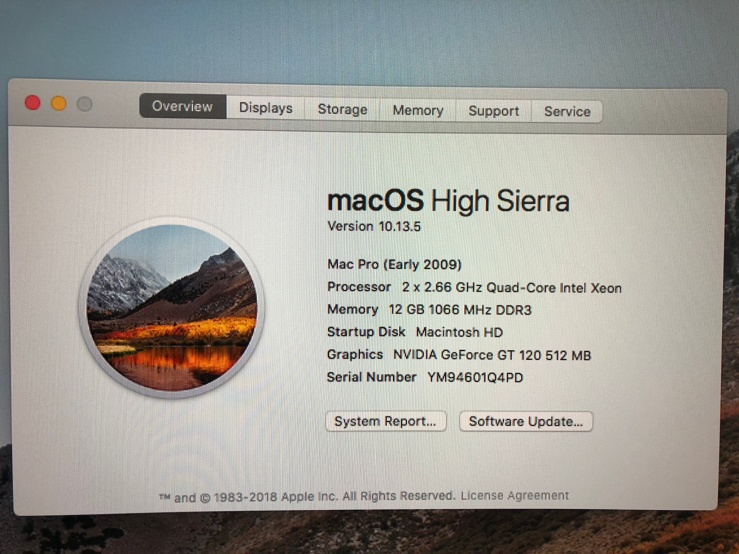
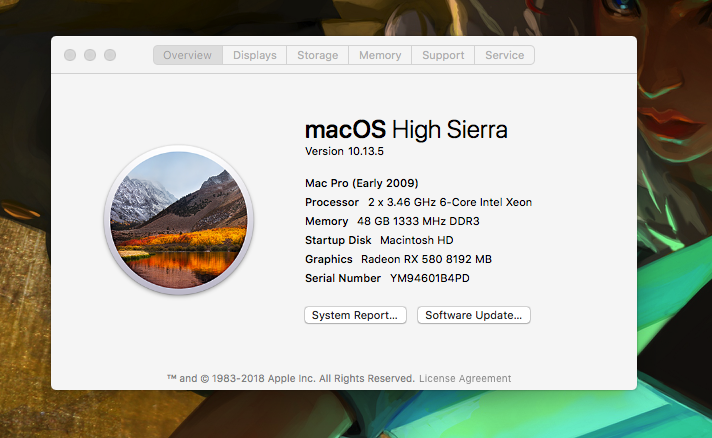
It was recognised as 3.46 GHz 6-Core Intel Xeon immediately. All of the rams are recognised as well. First success for cpu A! Now it’s time for the cpu B.
For the next cpu, I have put the cpu tightened on the vice the same way like the first time. But due to the time restrictions I’ve left it over night and going to try yanking it the next day. Surprisingly, the lid came off in 10 seconds when I make the first twist. Seems like leaving the cpu on the vice overnight is the best and easiest way to delid the cpu.
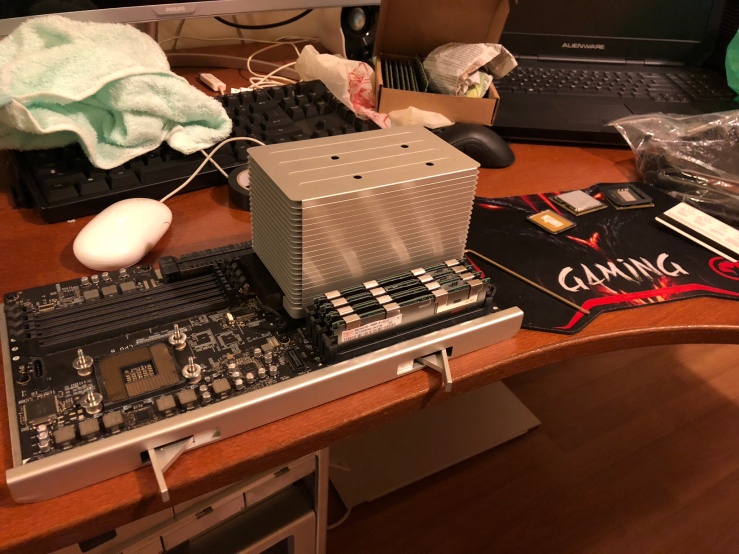
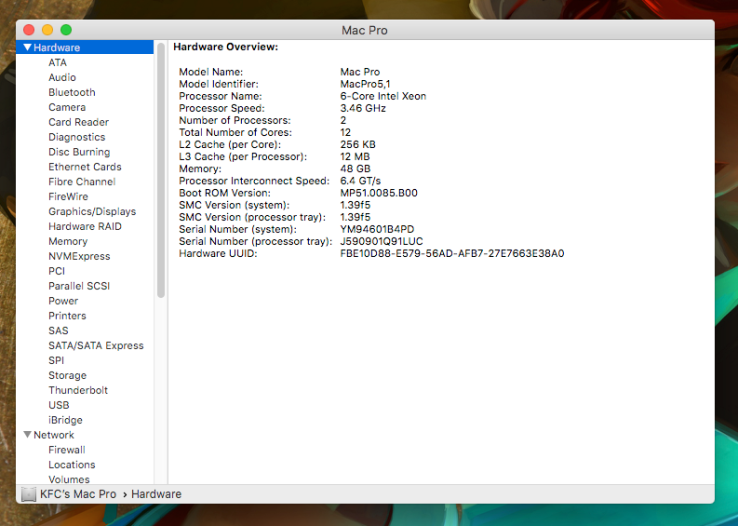
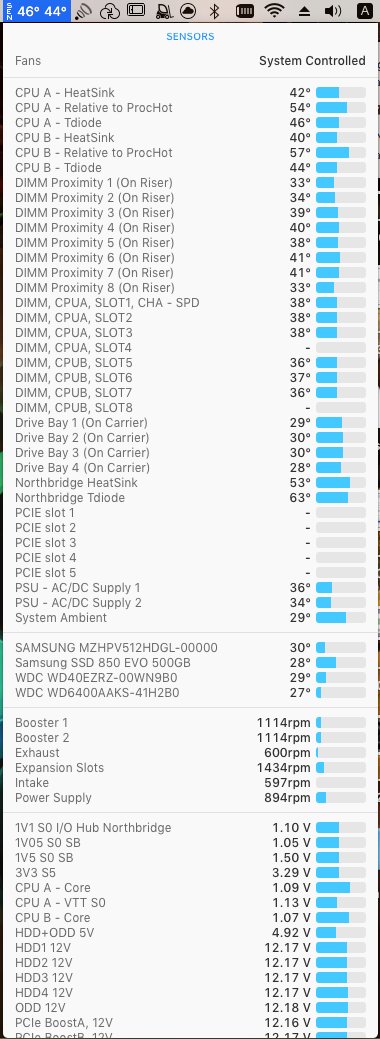
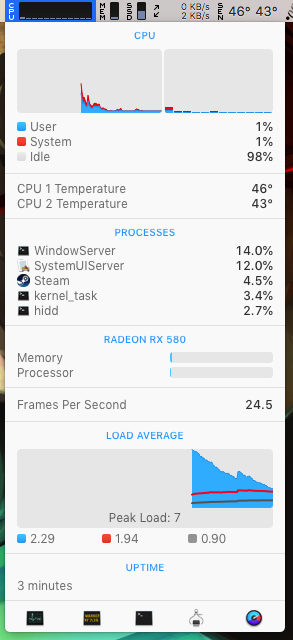
Finally I’ve got all 2 cpu in my system. CPU temperature and Northbridge all seems good enough.
Here’s all 24 of the threads of the CPU with hyperthreading.
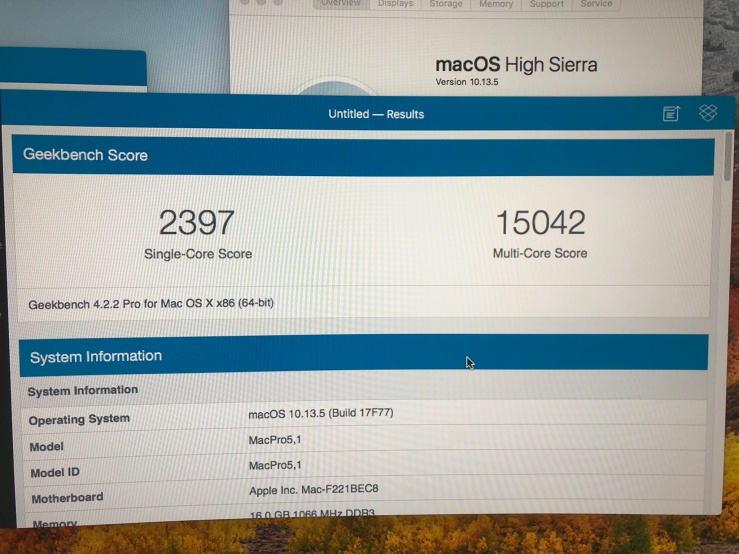
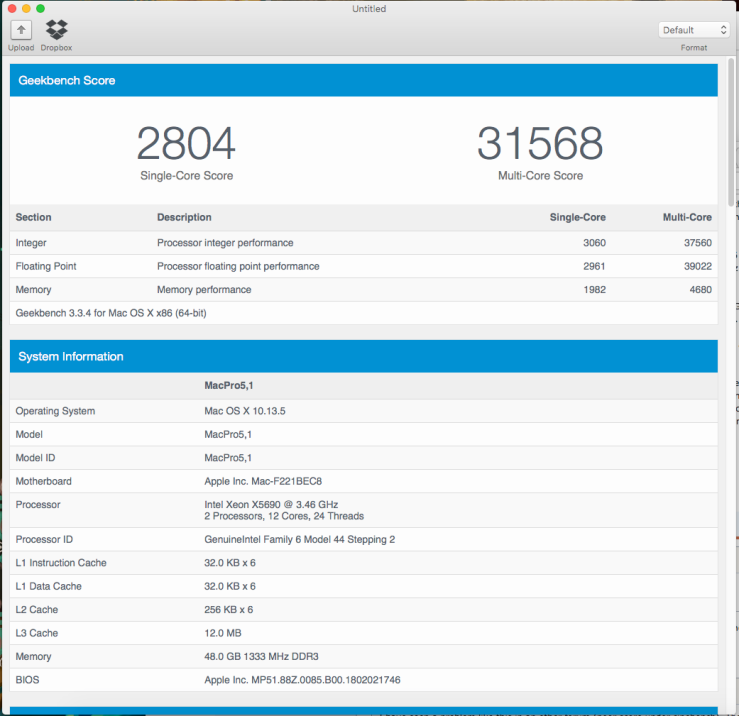
Here’s the Geekbench 4 64bit score.
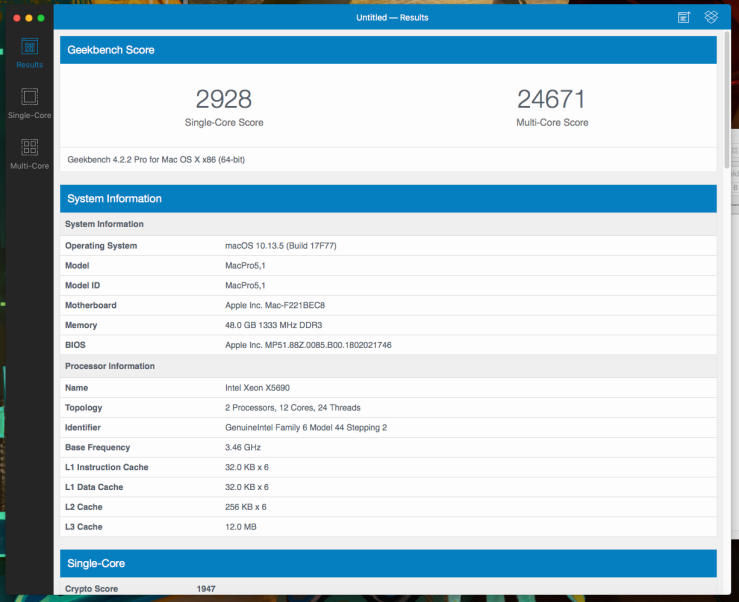
And here’s the Geekbench 3 64bit score.
It was a fun project. Love the final result.
2 weeks later, my 16Gig ram sticks arrived.

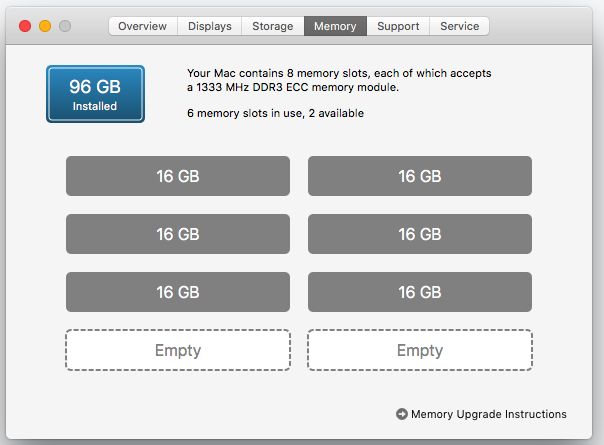
I’ve put 3 rams on each side of the CPU. So it’s running full speed in tripple channel at the moment.
Very happy with the system now. The FCP video editing and render speed are very close to the results of an iMac Pro (entry spec).
I’ve paid RM 1,500 in total including of shipping for each of the CPU tray.
The 5,1 cpu tray came with 12 core X5650 which I can recycle for my other x58 based windows PC for overclocking project.
Is the upgrade worth it? you may ask.
It’s totally worth it!
